
Heading
Body
Column 1 Sub
Column 1 Body
Column 2 Subheading
Column 2 Body
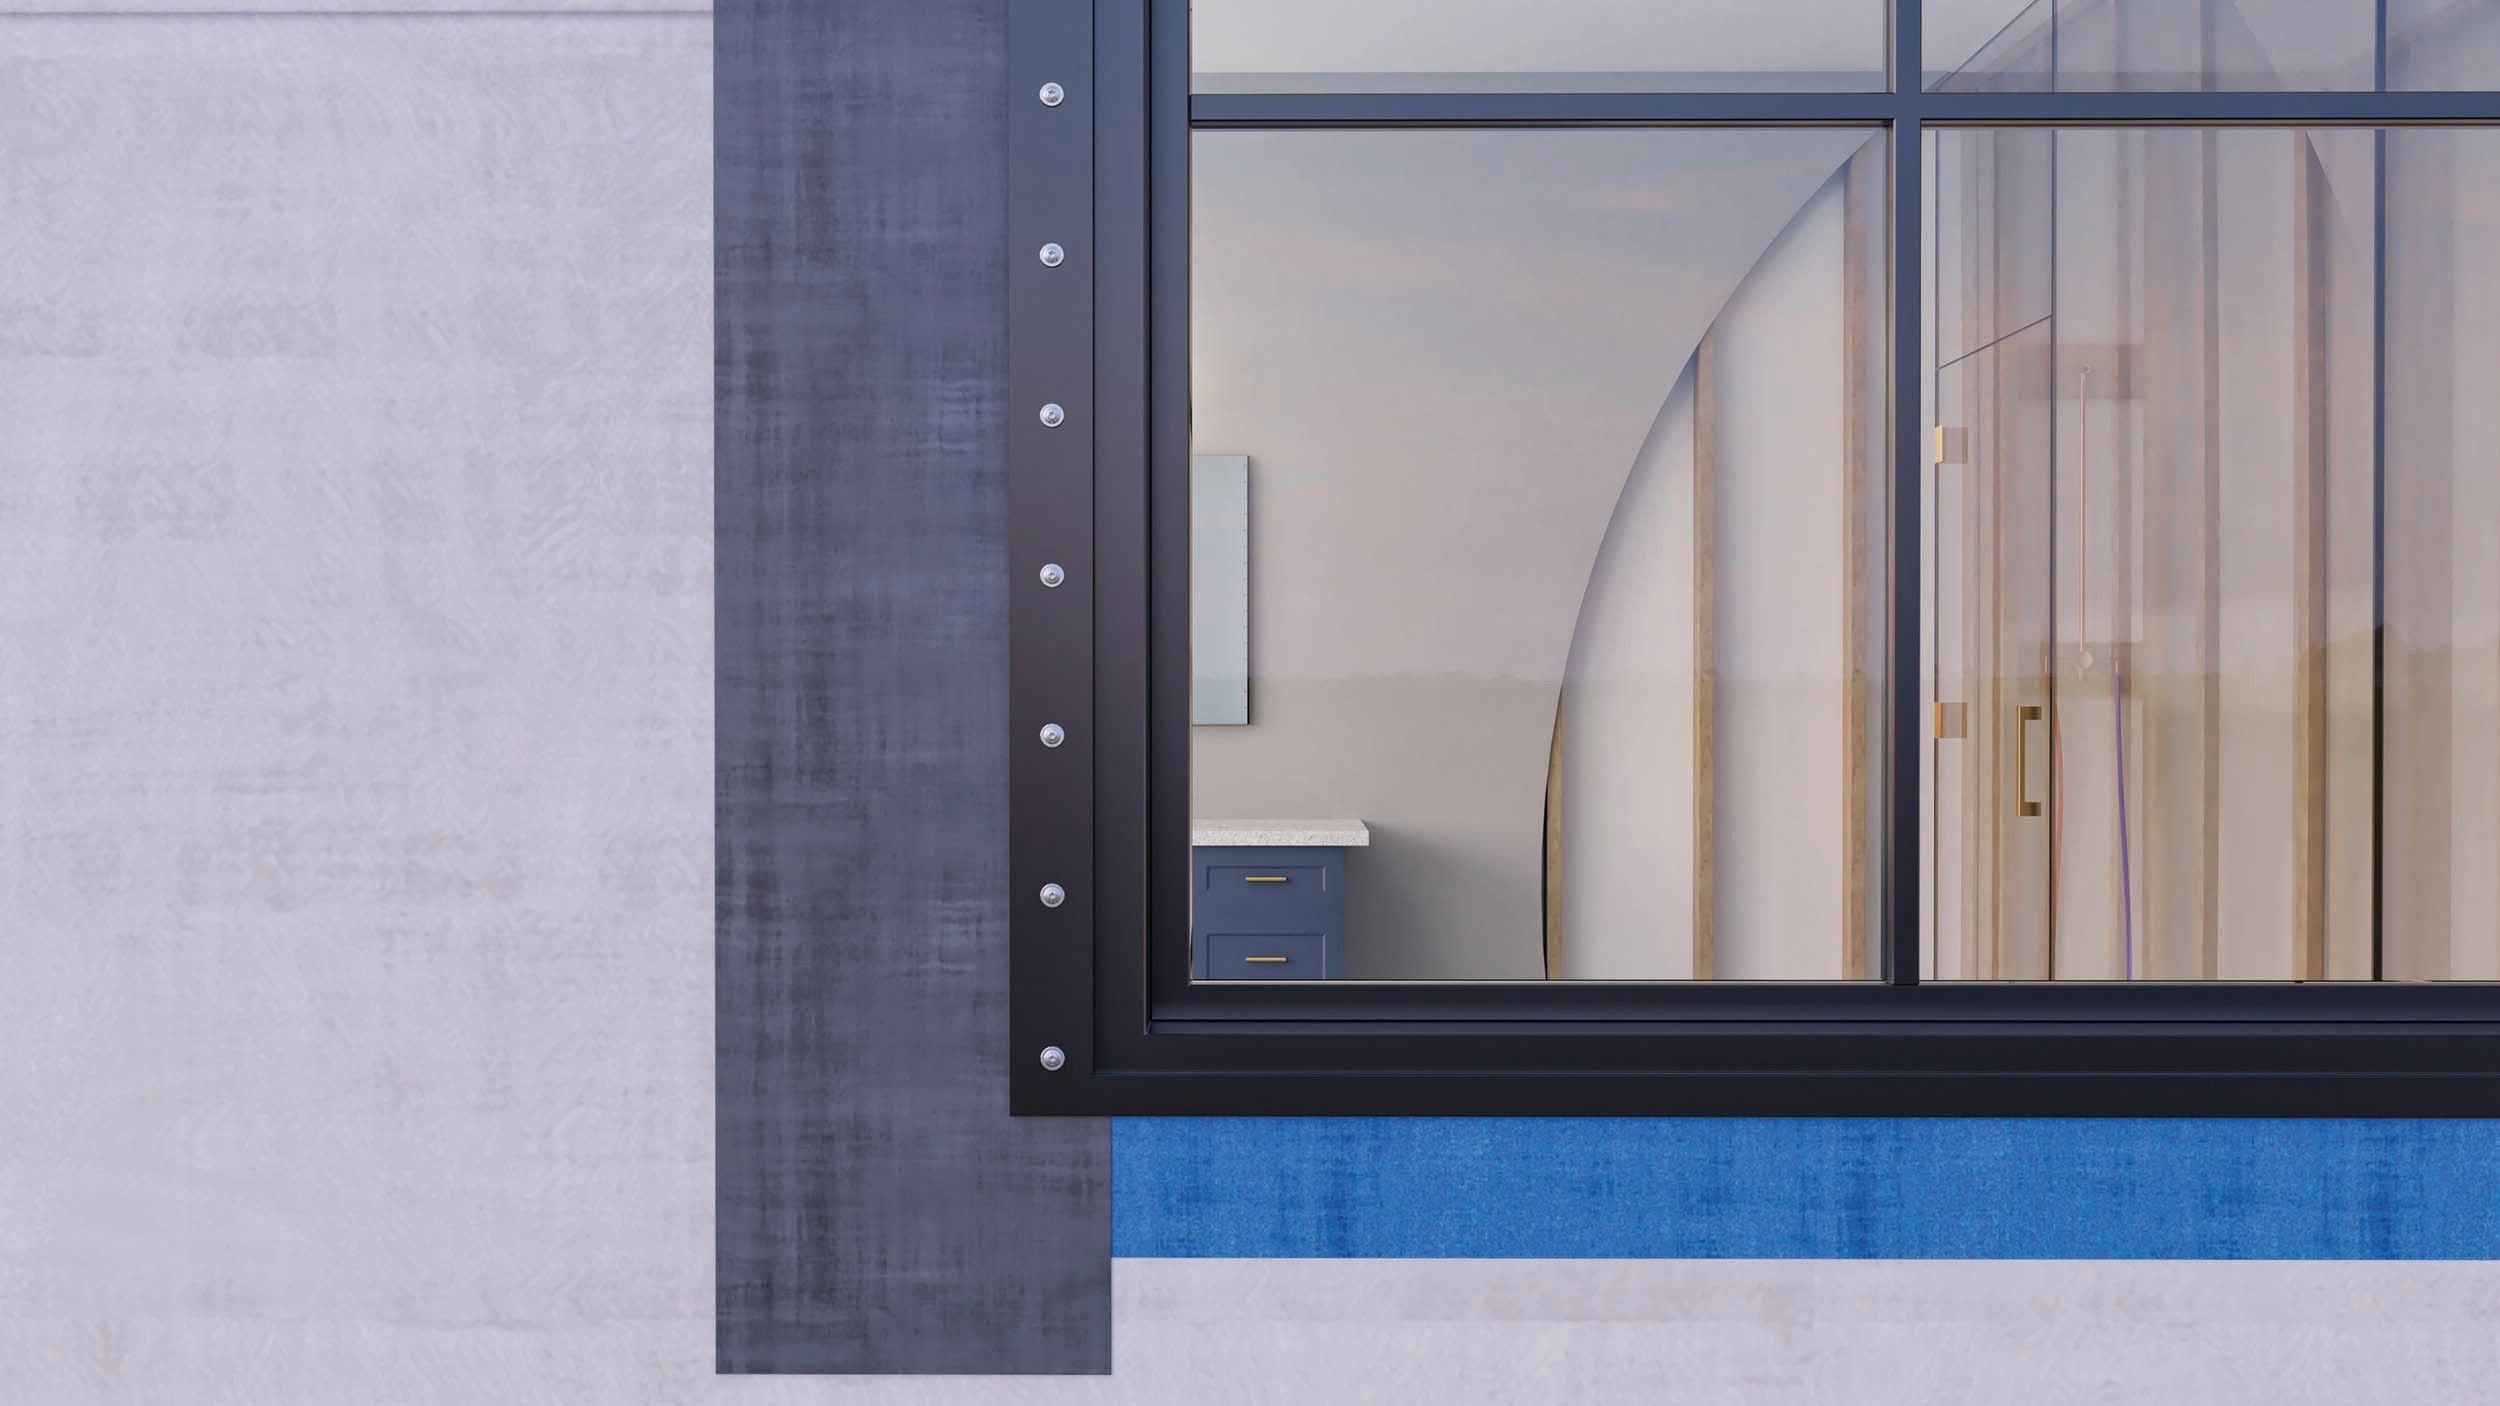
How To Install Windows
1. Gather the necessary tools and materials
You'll need a tape measure, level, hammer, screwdriver, drill, saw, pry bar, caulk gun, flashing tape, shims, screws, and the window unit itself. Ensure you have the appropriate size and type of window for your opening.
2. Measure and prepare the opening
Determine the size of the window based on the manufacturer's specifications. Mark the dimensions on the wall, making sure it's level and plumb. Remove any siding or interior finishes around the opening, taking care not to damage the surrounding structure.
3. Install the sill pan/flashing
Install a sill pan or flashing tape at the bottom of the rough opening. This helps prevent water infiltration. Follow the manufacturer's instructions for the specific product you're using.
4. Insert the window
Place the window unit into the rough opening from the exterior side. Ensure it is centered, level, and plumb. Use shims to adjust the position and make sure the window is square. Check for proper operation of the sashes and ensure they open and close smoothly.
5. Secure the window
Once the window is properly positioned, secure it to the frame by installing fasteners through the window flange. Follow the manufacturer's recommendations for screw sizing and placement.
6. Insulate and seal
Apply insulation material around the window frame to improve energy efficiency and minimize drafts. Use expanding foam or insulation strips, depending on the specific window and your insulation needs. Then, apply caulk around the exterior perimeter of the window to seal any gaps and prevent water infiltration.
7. Finishing touches
Replace any interior finishes or trims, such as drywall or trim molding, to complete the installation. Attach trim using specialty trim screws for a clean flush look. Ensure everything is properly aligned and secure.
It's important to note that this is a general outline, and the specific steps may vary based on the type of window, your local building codes, and other factors. It's recommended to consult the manufacturer's instructions and local building authorities for specific guidelines and requirements for your area. Additionally, if you're not experienced with window installation, it may be wise to hire a professional contractor to ensure the job is done correctly and safely.
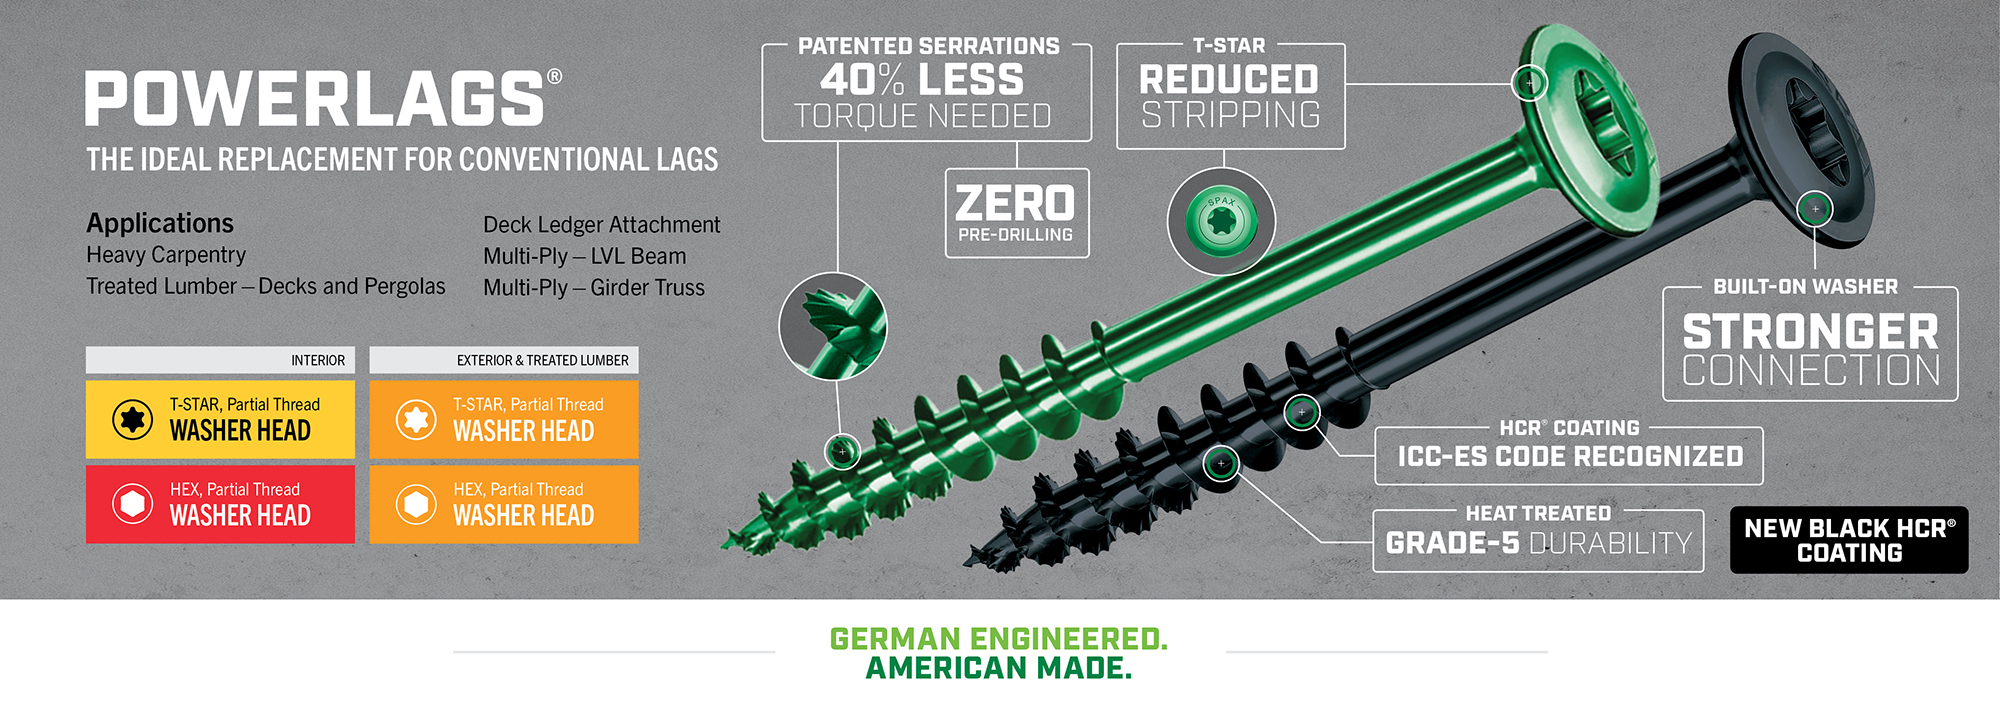
FOR STRONG WOOD-TO-WOOD CONNECTIONS
German engineered and American made, SPAX® PowerLags are professional grade structural screws and sold in job-friendly package quantities, including bulk pails.
- No pre-drilling required (1/4" and 5/16")
- Heat treated for strength and durability
- Independently tested DrJ Engineering Technical Evaluation Reports (TER No. 1912-07; Structural Wood Fastener Properties; TER No. 1711-01; Deck Ledger Attachment and TER No. 1802-03; Multi-ply: Sawn Lumber Assemblies & Engineered Wood Assemblies)
- Serrated threads require up to 40% less driving torque to increase installation speed while helping prevent cracking in logs
- Built-on washer head designs eliminate the need and extra cost of a separate washer
- Fastener length stamp on the head provides convenient identification without measuring and aids on-site inspections.
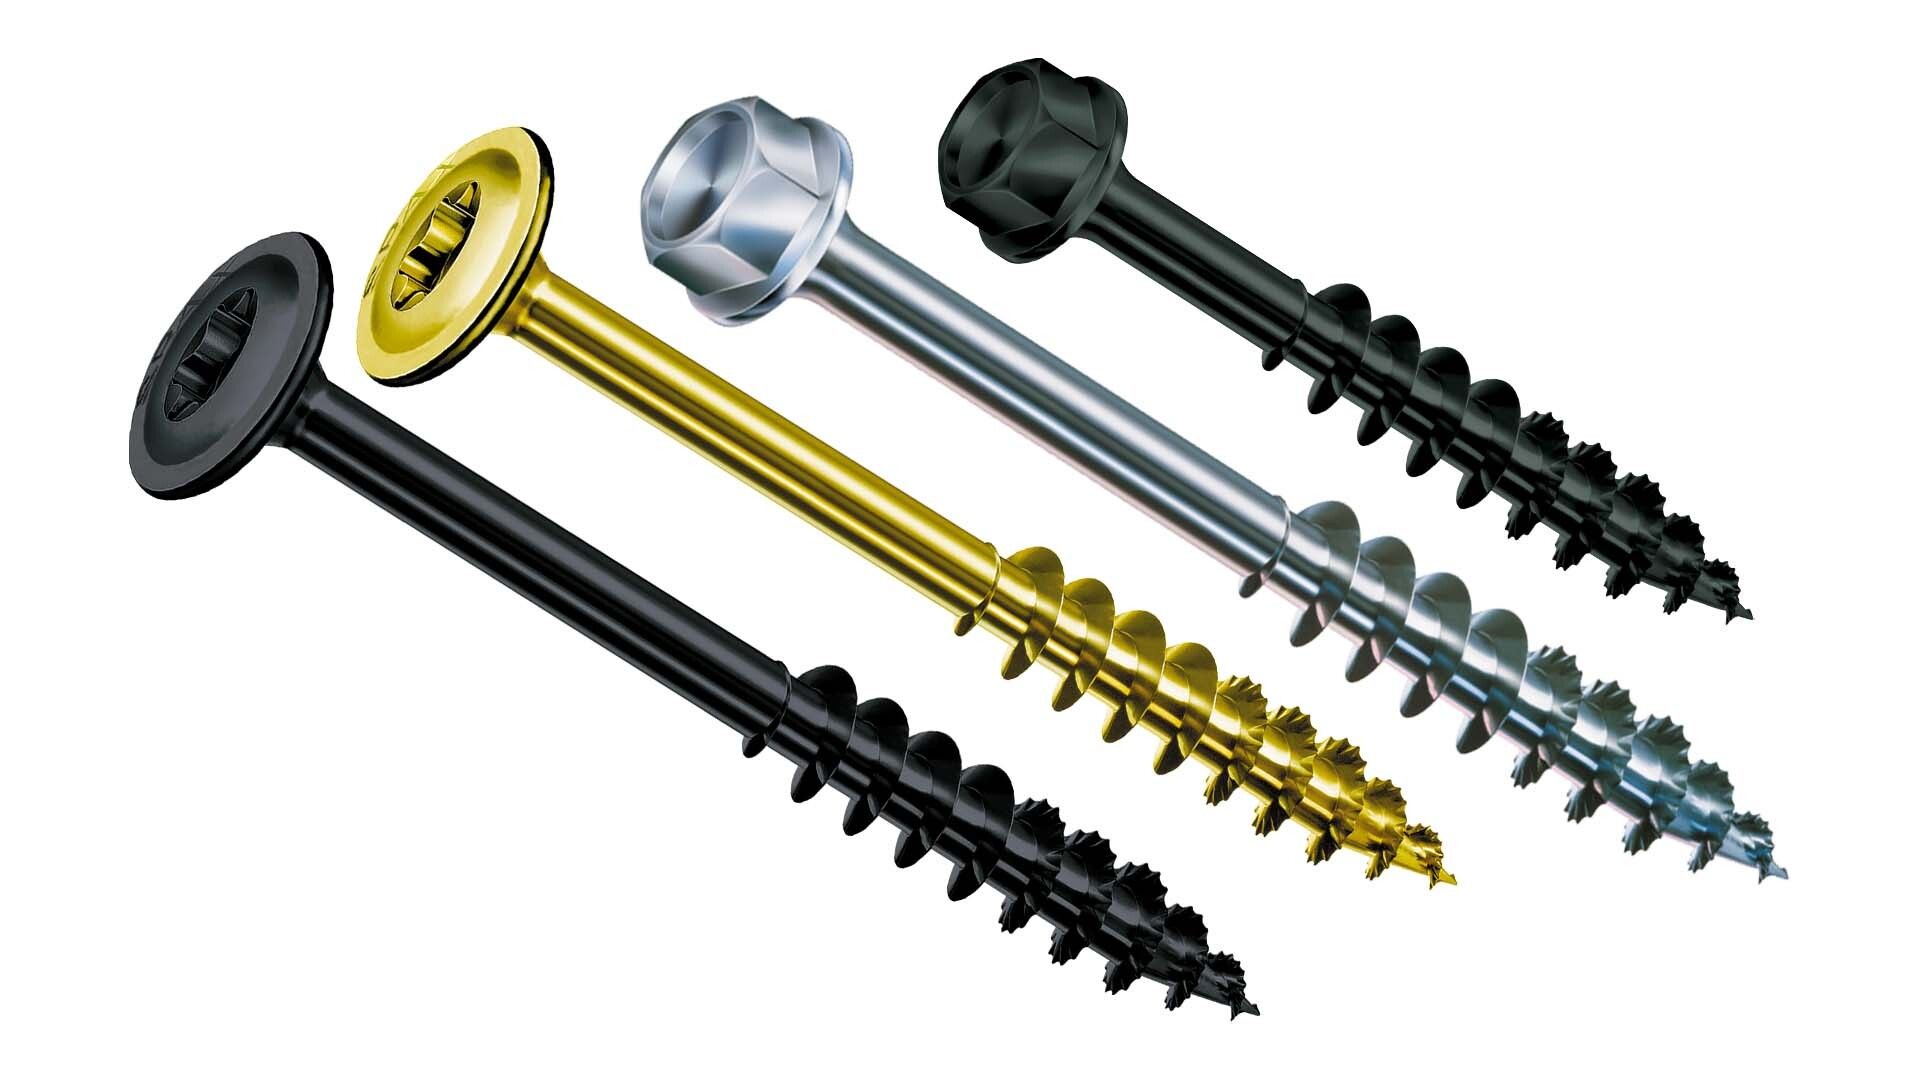
SCREW STYLES
- Hex head style
- T-STAR head style
- Zinc, yellow zinc, coatings options for interior applications
- HCR® (High Corrosion Resistance) coating for exterior use, including treated lumber